Equipment Needed
You'll need the following equipment:
- Your device with Smart Inventory App loaded
- Measuring Tape
- Paper and tape (optional, recommended)
- Printer
- Labels
- Shelf Clips
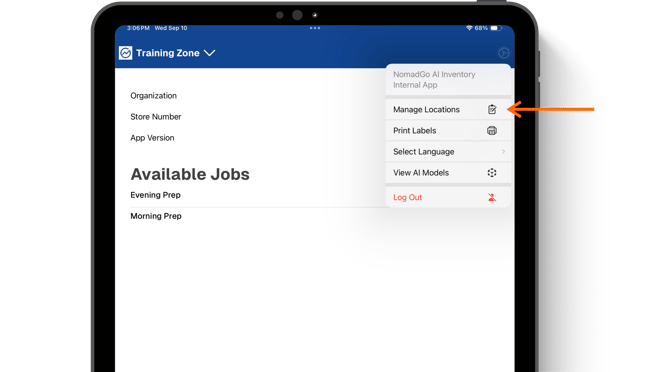
Step 1: Open Manage Locations
Launch the NomadGo App and sign in. Once the Start Screen has loaded, tap the settings menu in the top-right and select Manage Locations.
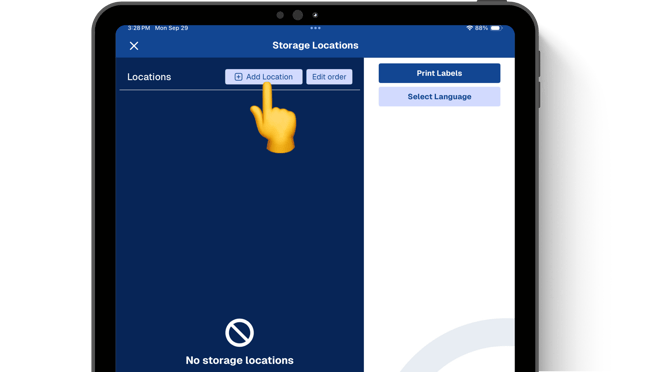
Step 2: Select Add Location
Step 3: Give your new location a name
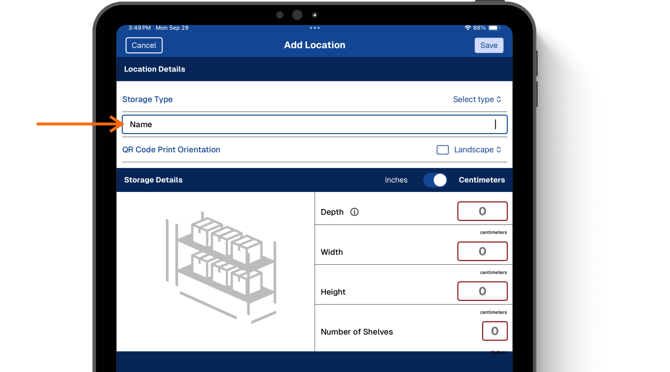
Use names your team will instantly recognize, like "Front Cooler" or "Cup Cabinet."
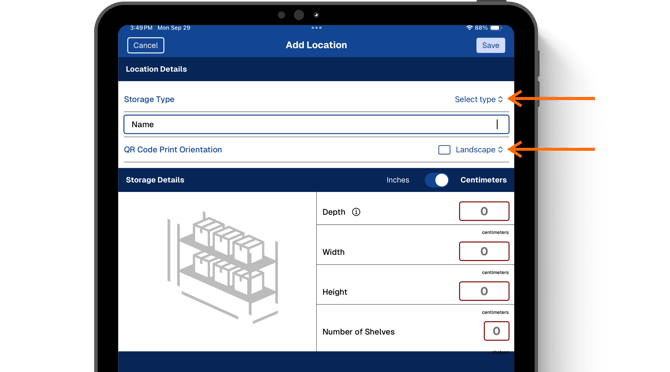
Step 4: Set the Location Details:
Select what type of storage location you're creating and choose a QR Code orientation for printing.
-
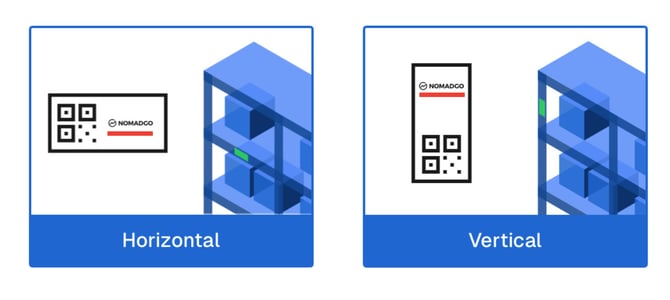
- Landscape (horizontal): Best for shelves with shelf clip space.
- Portrait (vertical): Handy when labels need to be applied vertically like thaw racks.
Orientation means how the QR code is printed — horizontal or vertical — not where it’s placed or how it's scanned. Always stick labels at eye level if possible.
Step 5: Measure your storage:
Accurate measurements a must – scanning is more reliable, and mistakes are less common when proper measurements are entered.
Read Measure Like a Nomad-Pro for tips and tricks on taking accurate measurements.
- Depth: Back of shelf/cabinet to the front edge (where the label will go).
- Width: Side to side where products sit.
- Height: From bottom to top of the storage unit.
- Shelves: Count every level where product can be stored (yes, even the bottom of a fridge or top of a rack).
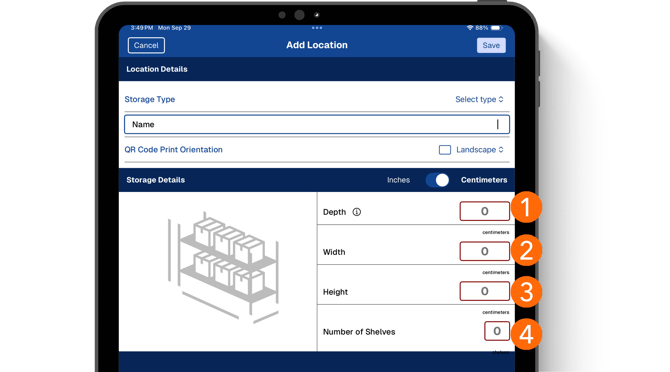
Depth is the most important — if this is wrong, your counts may be off. Always measure with a tape measure from the very back of the shelf to the front edge.
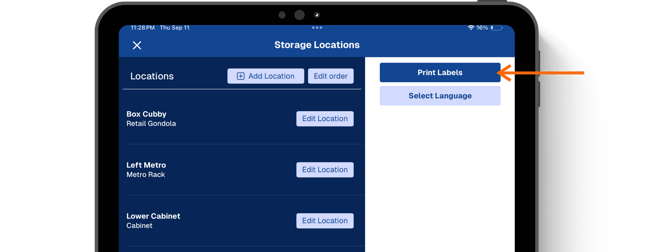
Step 6: Print QR Codes and Product Labels:
When all locations have been created tap Print Labels.
First, print the QR Codes and place them to print and place on your storage locations. Then return to the label printing options to print and place the Product Labels.
Follow these Inventory Basics guidelines for label placement:
- Shelved units with doors = QR Code goes outside on the door, Product Labels go inside on the shelf.
- Shelved units without doors = QR Code is placed directly on the front edge of the shelf, Product Labels are placed on the front edge in line with their items.
- Wire Metro Shelfs = Use shelf clips to place QR Code centered at eye-level and to place Product Labels with their items.
Check out our Printing Guide for tips, tricks, and rules for special cases (like cups).
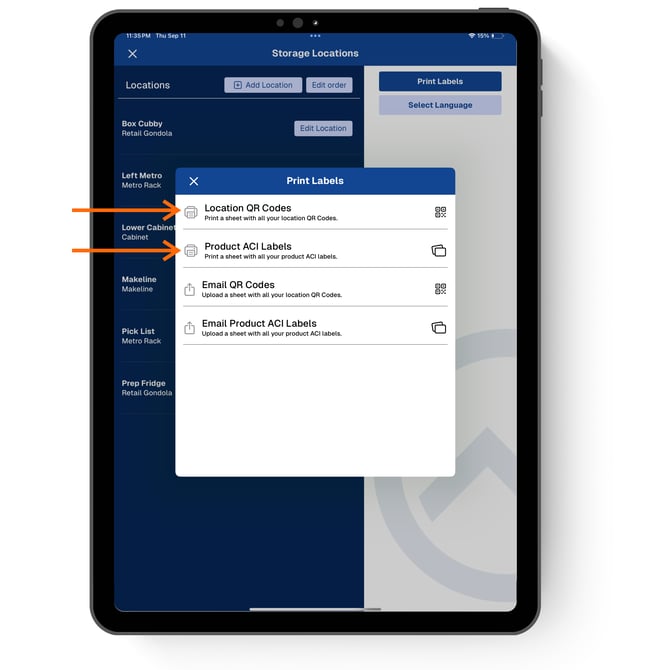
No printer? No problem — You can also email the labels to yourself and print later. Tap the Email option, enter your store assigned email, then tap Send Email.
Step 7: Validate your locations:
Check into a Location to perform a test; If the initial counts match to what's on your shelves, you’re all set!
If your test count seems off, double-check your depth measurement first — this is usually the cause. Check back into the location after adjusting your measurements to validate.
⚠️ If you delete and re-add a location, you’ll need to print a new QR label for it.